Tuesday, 15 December 2015

Love You

Good Tuesday morning everyone

Well what a start to my week. Mammogram Monday (routine one). I was the first one for the day. Although she was really lovely and really chatty, she said are you ready to be a little man handled. What can you say, No, or go for it! When she started her man handling, I said GOOD GRIEF you could have warmed your hands up, and because of that I think she gave that dial an extra tweak, then said, right hold your breath!. when all I wanted to do was shout Ouch! and then slap her, or is that just me!. Four photo's later, and red raw from the clamps I left thinking thank goodness that's done and dusted. Fingers crossed now for a good result. I really don't think our men folk know what we go through. If they had their bits man handled with cold hands then slapped in between 2 plates, squeezed till they want to shout Ouch!, told to hold your breath,  and say cheese!! I dread to think of the obscenities. Sorry ladies!!

I hope you are all managing to finish your Christmas shopping and wrapping the presents and have placed  them under the tree ready for the big day. I am sooo behind this year, never known a year like it. Claire & Craig can't think of anything, but then again want so much!  Craig with a new home  & Claire with baby on the way. We have already bought all the baby furniture for the nursery and are in the process of carpeting Craig's lounge and he wants a wall unit for his big TV and  man stuff ( Games ), but that's nothing to do with Christmas.Got To get things sorted this week.

Paul said he wanted to buy me the new Platinum machine as he is fed up with me saying the other machines don't cut in the middle, what do you think? Do any of you have this machine, and would you recommend it. Rose I think you said you had purchased this machine, what do you think of it? Is it worth it's money?

Anyway, enough already! Here goes with this weeks card.


Hope you like it!


Products used:-

Creative Expressions- Foundations card- Black, Custard & Coconut White
Creative Expressions- Sentiment- Sweet Thought stamps
Creative Expressions- Glacier Ice
Creative Expressions- Pearls
Sue Wilson- Embossing Folder- Large Climbing Vines
Sue Wilson- Finishing Touches- Magical Butterflies
Sue Wilson- Finishing Touches-Maidenhair Fern
Sue Wilson- Embossing Folder- Large Climbing Vines
Sue Wilson-Frames- Tags- Alexandra
Spellbinders- Fantastic new Cinch & go Flower Dies


http://drakesfieldcards.blogspot.co.uk

Tuesday, 8 December 2015

FRIEND

Good Tuesday Morning everyone

I hope you have all survived this horrendous weather. Although it seemed relentless down here in Wiltshire, those poor people in Cockermouth and further up north are having such a tough time. I was up at 4.30am on Sunday morning and I watched the news about the flooding and a lady rang in saying that she couldn't get into her ground floor home as the water was up to the window and her daughter's 2 cats were in the home and she didn't know if they were OK. It's so sad. I haven't stopped thinking about her and wish the BBC had followed that story up. I hope our government help all the people affected yet again  after failed new flood defenses. We as a country give to lots to charities, but I think sometimes we need to think of the people in our own country 1st. ( Sorry about that rant ).

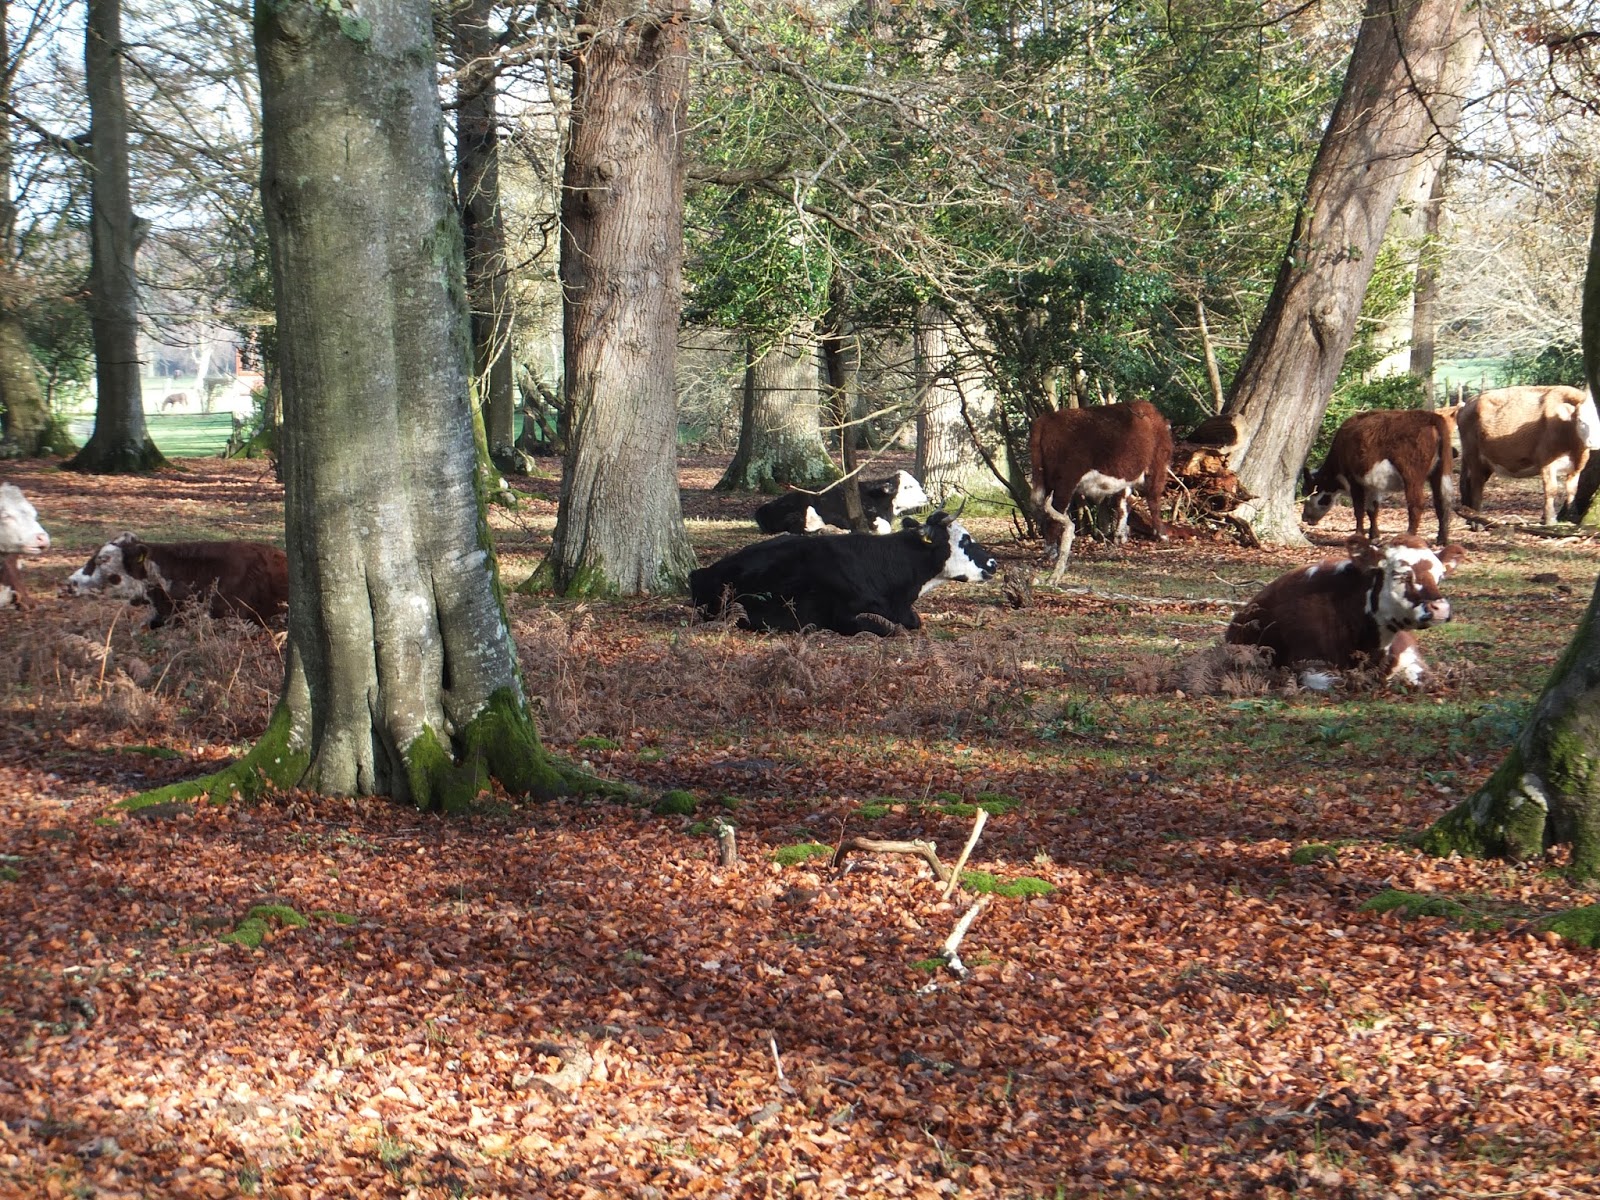
We did have some sunshine today, hence the photo's of the New Forest animals after my card. As the weather is meant to turn to rain and wind again, I thought I would go to the wholesalers and a drive home through the forest. I remembered to take my camera & phone this time.

Take care everyone, hope to see you next week, but understand as we are all so busy this time of year. Enjoy putting your decorations up and all the Christmas shopping!


Here Goes!


Products used:-

Creative Expressions- Foundations- Coconut  white & Periwinkle
Creative Expressions- Iced Snow
Creative Expressions- Sentiment Stamps- Thoughtful Sentiments
Cosmic Shimmer- Embossing Powder- Detail Silver Shine
Creative Expressions- Dazzlers
Heartfelt Creations- Enchanted Mum Stamp
Heartfelt Creations- Enchanted Mum Die
Sue Wilson- Finishing Touches- Magical Butterflies
Sue Wilson- Finishing Touches- Maidenhair Fern
Sue Wilson- Austrian Collection- Salzburg
Sue Wilson- Frame & Tags- Pierced Flags
Sue Wilson- Striplets- Ornate Octagons


http://drakesfieldcards.blogspot.co.uk


Sadly didn't see the dinky donkey's


I wish I has taken a video of the horse on the ground, she was having a whale of a time. There's something quite lovely watching an animal as large as this acting like a little puppy. Then she got up and ran about like a lunatic for quite a while, just lovely!!


Who said girls can't have beards and still look beautiful.

This horse was in her field watching the horse in the above picture rolling about. I wonder what she was thinking?

Stay Safe everyone

Big Hugs

Tina XX

Tuesday, 1 December 2015

Especially For You

Good Tuesday morning everyone.

OMG ladies, It's December already. This time last year I had most of my presents bought, but this Christmas seems to have crept up very quickly this year. I think its because there has been so much going on, with Claire, Craig moving twice and also my sister moving over here. I feel exhausted just remembering all of it. I was going to say hopefully next year will be less manic, but Claire will be having our 1st grandchild, so I'm thinking Maybe NOT!! Bring it on I can't wait.

Claire went down to Bournemouth on Sunday to see Craig's new apartment, and she called in to see us on her way home. I only saw her last week, but when I saw her again on Sunday her bump had grown so much, so I took another photo for the mum & baby book I'm making. She is blooming beautifully.

Right, on to the card this week. I think Christmas cards have finished now, but you never know. It was nice to go back to my butterflies,I have missed them. I know there are a few ladies on my blog that love butterflies as much as I do, so hope you like them. Oh, and I have to say sorry that it is Chrysanthemum's again but I couldn't just put them aside so I added some sparkle and used them on this week's card.


Here Goes!


 Products Used:-

Creative Expressions- Foundations Card- Coconut White
Creative Expressions- Dazzlers
Creative Expressions- Pearls
Spellbinders- Delicate Asters
Spellbinders- Les Papillions Two
Sue Wilson- Noble dies- Double Pierced Squares
Sue Wilson- Frames & Tags- Alexandra
Sue Wilson- Finishing Touches- Delicate Fronds
Sue Wilson- Embossing Folder- Rambling Rose


http://drakesfieldcards.blogspot.co.uk


How to make:-

First I made my 1st mat & layer, but kept it really plain. The next smaller layer I used the Sue Wilson Rambling Rose embossing folder. and used sticky pads on the back for dimension. I then cut all the dies from the Alexandra die set but cut 2 of the larger fancy cuts and placed one horizontal and one vertical. I cut and glittered the 2nd smallest die and added pearls then the sentiment was made with the central die, I stamped it and and added some glue and rock candy for sparkle. I layered each die cut with sticky pads, but the centre was stuck down into all the other dimensions, I hope this makes sense. I cut out the petals from the Aster die to make some Chrysanthemum flowers ( last weeks tutorial ), added glitter to the tips and arranged on the card along with  some leaves and the fronds die. Finally I added some butterflies, double layered with white & silver card.

Hope you like it. Same time same place next week. Any ideas for a tutorial?

Big Hugs

Tina XX


Thursday, 26 November 2015

Another Aster Flower

Hi Everyone

I hope you are all well. I hate talking about the weather all the time, but I hope you are all coping with all this awful rain.

Today's tutorial is a flower made from the Spellbinders delicate Asters.

It was a request by Denise to see if a Chrysanthemum could be made from the Aster die instead of the Enchanted Mum die from Heartfelt Creations.

Well here is my version, you decide. I didn't colour or emboss it, but I think it could look just as good with some embossing and some colour, what do you think?


Here goes!


These are all the items you will need


These are the cuts you need


One of the large petals I folded under, and the rest I curled upwards


Start layering them together


This is the flower when finished. I think would look nice as a water lily, or is that just me!


Then curl the petals in different directions, do as much or as little as you like.


This is my finished flower along side last weeks Chrysanthemum. Just imagine if you stamp & emboss and colour it, I think this flower is just as pretty, it's just as quick and effective . Dazzler optional, looks good with pearls too.

That's it. Any more idea's for a tutorial?

hope you liked this tutorial too. What do you reckon Denise! See you all soon. X

Big Hugs

Tina XX

Tuesday, 24 November 2015

NOEL

Good Tuesday Morning everyone.

I hope you are all well and managed to survive all the gales and lashings of rain, I think you had it really bad further up country, poor you! wouldn't it be lovely to see the sun for more than a few hours a week.

After the boiler man left on Monday I zipped over to the wholesalers to get some goodies for the week and while driving home thought I would drive through the forest and take some photo's of the animals that roam there. I parked up and watched 2 little dinky donkey's playing it was soooo cute. When they had finished playing they came over to the car so I thought I would catch their beautiful little faces with my camera, and at that moment I remembered I had used the camera yesterday to take the pictures of my card and had forgotten to put it back in my bag, so I thought no problem I'll use the phone, then realised I'd left that at home too. I panicked then because I had taken a different route home and there weren't any houses around and thought if I had broken down. YIKES! I know I would have been able to walk to find a house eventually,  but what scared me more was a herd of Aberdeen Angus cows with very big horns coming towards the car, and I would not have liked to walk through them, even though they've got beautiful faces they were Massive. What did we do before mobile phones, and how vulnerable you feel without them, or is that just me!

Take care everyone, more wind and rain on the way, batten down them there hatches. See you same time same place next week!

Big Hugs :-)

Tina XX


Well here goes with the last Christmas card for 2015, I hope you like it!.


Hope you like it!


Products used:-

Creative Expressions- Foundation Card- Periwinkle & Coconut White
Creative Expressions- Glacier Ice
Heartfelt Creations- Open Vintage Floret pre cut set
Cosmic Shimmer- Embossing Powder- Detail True White
Tim Holtz- Distress Ink- Weathered Wood
Sue Wilson- Festive Collection- Snowflake Corner, Border & Tag
Sue Wilson- Finishing Touches- Laurel Leaves
Sue Wilson- Festive Collection- Pine Bough
Sue Wilson- Festive Collection- Noel Star
Sue Wilson- Festive Collection- Classic Poinsettia
Sue Wilson- Festive Collection- Snowflakes
Sue Wilson- Embossing folder- Snowflake Lattice


http://drakesfieldcards.blogspot.co.uk

Thursday, 19 November 2015

Enchanted Mum

Hi Everyone

Sorry It's late in the day to post the tutorial. Better late than never though.

Today's tutorial was a pleasure to make and so quick as it's all cut in one go. I cut the flower out twice to make it, more full. You don't have to, it's up to you.

Here Goes!


These are the product I used


First I stamped the image with Perfect medium and used silver embossing powder, then heat embossed it.


I then placed the die over the stamped images.


As I said I cut two lots out


The 1st large flower I folded the petals under


I then folded the 2nd large flower upwards, and also curled the remaining petals upwards.


When all the petals are put together I used the end of my paint brush and curled some of the petals in different directions.


And this is the finished flower. I did add a dazzler, but again that's optional as the centre of the flower is pretty without it. I also layered the dragonflies. So that's it, done! Hope you like it.

Big Hugs

Tina XX


Sunday, 15 November 2015

JOY TO THE WORLD

Good Tuesday morning everyone

Well so glad that weeks over. First of all I would like to thank everyone for your lovely and reassuring comments for Claire, you are all so lovely and caring and I passed them all onto Claire, and it really brought a smile to her face. Also thank you for the lovely comments on my tutorials

 last week my car went in the garage to have a door lock fixed, the mechanics of the drivers window replaced and a couple of bulbs in the dashboard replaced, and we came away £640 lighter. I got a call from Craig to say he had broken down with brake problems, so had to be towed to a garage, 2 days later, he went home with the car £460 lighter. I also got a phone call from Paul from the airport to say while he was in Jersey on work he had left his interior light on and his battery was flat. Luckily the airport has to deal with people like this everyday, so they jump started him and said just don't stall the car or you're on your own. At that moment I thought that's it I'm getting rid of the cars and I'm going to buy a pony and trap, at least it only needs some hay and somewhere to graze, and you even get something to put on the roses.

After Claire went back to the doctors she rang to say that it is quite likely that she will have this pain until the baby arrives. The pain is now in her coccyx and down her left leg . He has given her a less powerful pain killer and has reassured her it won't harm the baby, she had another session at the osteopath's and has another session this Friday. Fingers crossed it helps.

Craig came home for a few days as he wasn't feeling too special and needed some mum pampering time, luckily he was on holiday, but a painful one. When he arrived he came in the workroom with me. He pulled up a armchair next to me and asked if I had anything to alter the look of a photo frame he had just bought. I said how about gilding flakes, he chose his colour and asked to have a go. Well just over 3 hours later I finished the frame and Craig had enjoyed the same amount of time on his XBox. He went home Saturday afternoon with a cooked chicken, a large portion of Lasagne, Bacon, Cheese & Chocolate and lots of other goodies I hide in my workroom for when my two visit. I love to send them home happy with a box full of goodies.

Because of all the running around this week I haven't had much time to do as many poinsettias for the card, and I really needed to get started on my nieces wedding invitations too, so I hope you are not too disappointed this week.

Here Goes!


Hope you like it.

Products Used:-

Creative Expressions Card- Coconut White & Red
Creative Expressions Pearls
Couture Creations- Embossing Folder Swiss dots
Sticky Sheets
Ranger- Clear Rock Candy
Sue Wilson- Noble Dies- Double pierced rectangles
Sue Wilson- Configurations- Elegant Laced Edger
Sue Wilson- Festive Collection- Classic Poinsettia- Open Petals
Sue Wilson- Festive Collection- Classic Poinsettia
Sue Wilson- Festive Collection- Joy to the World


http://drakesfieldcards.blogspot.co.uk

How to make:-

First, I mat and layered the red and coconut card onto an 8x8 white card, and embossed with the Swiss dots EF. I cut a pierced frame and put sticky pads on the back and set aside. I cut a piece of red card slightly smaller than the pierced frame and covered it with a sticky sheet. I then cut out the Joy to the world die and cut it to the same size as the red card. I then took the top layer of the sticky sheet and placed the JTTW focal point onto the sticky sheet. I put some waxed paper over the top and rubbed it all over to make sure it had stuck firmly, then I sprinkled the glitter over it and burnished so it all unwanted glitter to put back in the pot. Next I put the frame I had cut earlier and placed over the focal point. On the back of the focal point I put sticky pads and set aside again. I cut 12 little corner dies out and glittered them. I attached the first 4 in each corner of the 8x8 card, then attached 4 more to each corner of the focal point, the remaining 4 I cut the fluer de lis part off and hooked it to the middle of the frame on the front and glued it in place, the other part of the corner I glued to the back of the frame. I then attached the frame to the card. Finally I cut a poinsettia out and covered it with glitter, I cut the poinsettia open petal out in red bit didn't stick them to the petals so that it gave a more dimensional look I cut some leaves added a bow made from bakers twine and glued to the corner with the flower. OK the final final thing I did was add some pearls.


I am hoping to do a tutorial this week, of what I don't know yet because I would like to get the fancy piece of my niece's wedding invitations done. If I do get time it will be on Thursday or maybe Friday.

See you same time same place next week for my card though. Thank you all again!

Big Hugs :-)

Tina XX