This is a quick tutorial of the Cinch & go flower, I hope you understand it, if not please leave a message and I will get back to you.
Here goes!

These are the items you will need

This is for the full rose

This for the bud

spritz with water to make the cinch easier

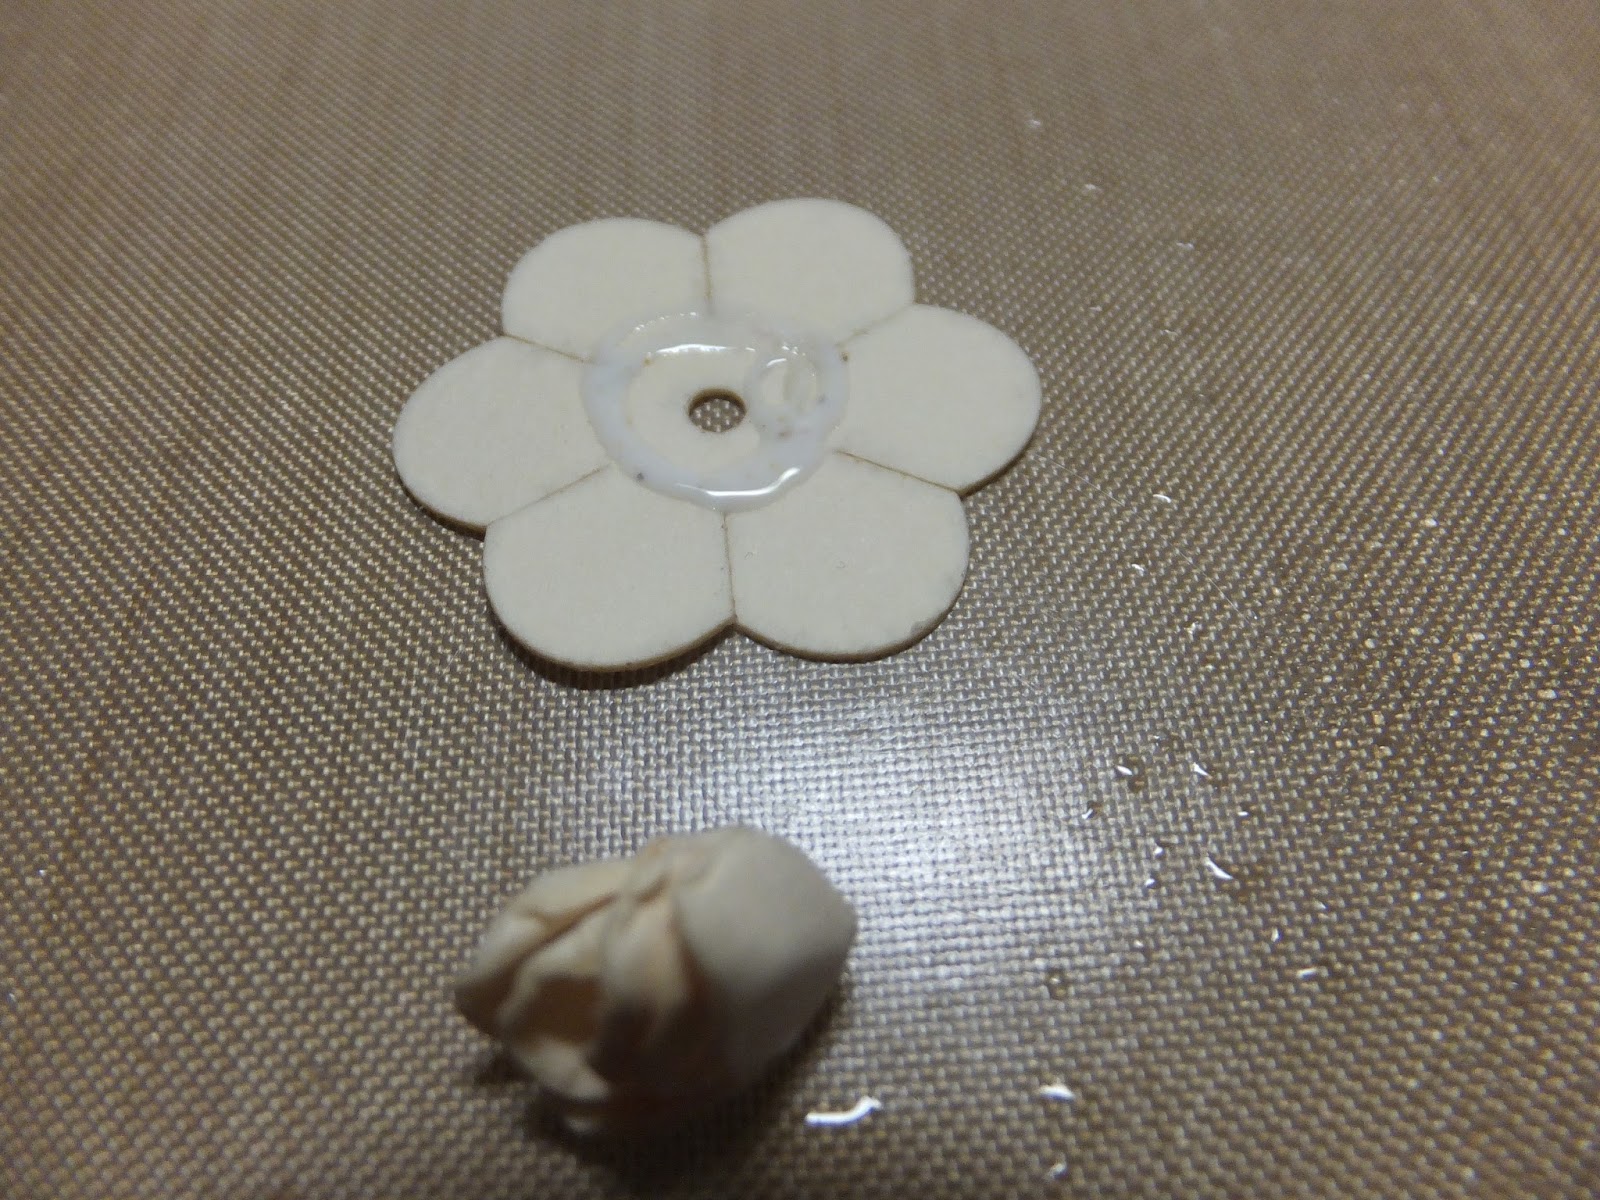
Add some more glue and add each layer of petals

You will end up with a bud like this, if you want it tighter just scrunch it tighter or add a bit more glue to each petal


Once glued and dried, use the tweezers to open the petals.

I hope this tutorial comes out OK, as I was helping Paul with plumbing problems while doing this tutorial. any questions, please ask.
Big Hugs
Tina XX
Morning Tina, this is a great tutorial very easy to follow even where you place the glue fantastic.
ReplyDeleteNancyd xx
Morning Tina, makes perfect sense, I so love these tutorials as they are so easy to follow, pictures and words really do help.
ReplyDeleteStay safe, healthy and happy, hugs, June Smith xxx
Hi Tina,
ReplyDeleteThanks, this is perfect. Just one question... so far! What weight is the card you use for your flowers?
Thanks
Jan from NSW (Aus)
Hi Jayem
DeleteI use Creative Expressions Foundation card & it's 220gsm. Glad you liked the tutorial.
Big Hugs
Tina XX
Well your Tutorial looks easy to follow Tina, i have not got this die just yet .
ReplyDeleteHope you got the Plumbing sorted tut ? their are always problems before Christmas .
Take Care
Elaine H X
Hi Tina
ReplyDeleteAwwww, thank you for this, you are an absolute sweetheart! It is a beautiful set of dies with those extra flourishes and all. I like my old Spellbinders tattered roses but the cut is so close to the centre, so easy to tear the petals so I tend to just make more stylised flowers with those now. These, like Sue's roses aren't quite so delicate and seems they stand up to a little more manipulation. I am going to give my Spellbinders "create a flower" rose another go in the new year, I was given some lovely handmade paper yesterday which I shall save for flowers as it's a nice mid weight with lovely decoration.
Thank you again Tina, I appreciate how much time these things must take. I hope your plumbing issues got resolved.
Hugs from me to all of you and Billy thanks you for the fluffy cuddles and sends some big Billy kisses by way of return,
T x
Bless you T & Billy XX
DeleteHi, I love to visit your place on the net. So much inspiration here.The tutorials you give are aways clear. Thank you. You did well while helping out with the plumbing, while making this tut. at the same time....good on you! I do have one question....what paper have you used? Because of the close ups it looks like felt. Also what glue do you find best for making flowers? I am always after a quick drying solution... Hugs
ReplyDeleteHi SussiPoppins
DeleteWelcome to my blog, it's lovely to know you visit with all the other lovely ladies here. I hope you will visit again. Plumbing all sorted now thank goodness even though it went into the early hours, Thank you!
The card I use is Creative Expressions Foundation card 220gsm, the glue is also Creative Expressions dries clear glue. If you can't find that I also use PVA glue from Hobbycraft.
Big Hugs
Tina XX
Hi Tina, back from walking Ursula's dog .The weather is so good to us isn't it!
ReplyDeleteYour tutorial is so good and so clearly explained,very easy to follow .
Yes I also love Becca Freken's blog she makes gorgeous cards too,just like yours !!
Hope the plumbing job got done ,there is always something going on ,you must be ready for a holiday Tina with all the work you and Paul do?.
Looking forward to Tina Tuesday!Take care Love and big hugs for you and Paul also from Henk,Jane B.
Hi Tina great tutorial, really easy to follow, don't have this die but have something similar so will give it a try, or perhaps this is an good reason to get a new set of flower dies.
ReplyDeleteKeep well.
Wendyx
Thank you for the photo tutorials. They have very helpful and easy to understand. I got a chuckle about the mammo experience! I don't know how it is throughout the States, but here in Central Oregon they make it as comfortable as possible (warm up the hands and "plates") but not much they can do about the squishy part. I've been following you for a few months and enjoy hearing about your family and absolutely LOVE your beautiful cards. So wishing all of you in G.B. a Blessed and Very Merry Christmas from Oregon.
ReplyDeleteLinda
Hi Linda
ReplyDeleteYou are so welcome to my blog Linda,and hope you will visit again. I'm glad you had a chuckle about my mammo. Oh! for lovely warm hands and plates. Glad you enjoy your visits to my blog, lots of happiness are coming with the arrival of our 1st grand child in March or there abouts, really can't wait.
I think I can say this from all the lovely ladies on my blog, that we all send you the warmest of Christmas wishes from G.B.
Big Hugs
Tina XX
Thank you for the tutorial Tina, you are so good at explaining techniques. I always find flowers really difficult to make so I'll have a go at using your method! Thanks for sharing. Pat x
ReplyDeleteSorry I've been missing for a while Life and holidays get in the way Very easy tutorial Going to enjoy scrolling back to see what ai've missed of your splendid work
ReplyDeleteHi Tina. Thanks for another of your great tutorials. I have learned so must since i started visiting your blog. You are a true insperation to us crafters and i think your tutorials are fantastic as they are so easy to follow. My flowers now look like flowers since i started following your step by step instructions. Thanks once again for all your hard work in doing your tutorials and hoping you got your plumbing problem sorted out. Take care Tina and have a lovely weekend.
ReplyDeleteBest Wishes.
Denise T x
Hello Tina,
ReplyDeleteThanks for the fab tutorial. I have been wondering about getting this set (I have so many flower dies) but after seeing this, I'm going to order it, so I thank you, but the Bank Manager may ring you ha ha.
Now as to the plumbing problem that Paul had. I hope it was in the house and nothing personal !!!!!
love Maureen xx
Hi Maureen
DeleteIf your bank manager calls I will say you need to up this lady's over draught cause you never know what
else she will need.
Regarding plumbing, If it had been personal you would not have got me within feet of the problem. Thank goodness it was the Insinkerator ( which I call the butt munch, all the waste food.)
Glad you liked the tutorial.
Big Hugs
Tina XX
A brilliant tutorial Tina, thank you so much. I just need to but the die now xxx
ReplyDeleteHi Tina.
ReplyDeleteUr tutorial was fab I'll try this technique with some of my other flowers maybe il end up with a different type flower lol. Thanks for sharing xc
Wonderful tutorial! It's easy to follow and understand. I'm doubly excited to get out my new Cinch and Go dies and begin creating your roses. I've made some time consuming roses using other dies and really love the ease this new die set makes crafting a rose. Thank you for sharing.
ReplyDelete